What is Form 1099-NEC?
Form 1099-NEC is an information return used by the IRS to report payments of at least $600 made to nonemployees during a tax year. Before 2020, these payments were reported on Form 1099-MISC. The IRS reintroduced Form 1099-NEC to clarify filing deadlines.
Payments that must be reported on Form 1099-NEC include:
- Awards
- Commissions
- Fees
- Prizes
- Rent
- Royalties
- Other forms of compensation for services related to your trade or business.
If you need to report nonemployee compensation for tax years prior to 2020, you should use Form 1099-MISC.
Who Receives a Copy of Form 1099-NEC?
According to the IRS, businesses should issue Form 1099-NEC to recipients to whom they have paid $600 or more if any of the following conditions are met:
- The recipient is an individual who is not on your payroll.
- Payments were made for services related to your trade or business, including payments to government agencies and nonprofit organizations.
- The payment was made to an individual, partnership, estate, or, in some cases, a corporation.
How to File Form 1099-NEC with TaxFileApp
Filing your Form 1099-NEC with TaxFileApp is a simple process. Here are the steps:
- Sign In: Sign in to your TaxFileApp account.
-
Navigate to Dashboard: Go to the 1099/W2 Dashboard.

-
Start New Form: Click 'Start New Form' and select 'Form 1099-NEC'.
-
Select Tax Year:Click 'Start New Form' and select 'Form 1099-NEC'. Select the tax year for which you are filing.
Choose Entry Method: Select your preferred method for entering form details. You have three options:
- Manual Entry: Fill out the form by typing in the data.
- Bulk Import: Recommended for filing a large number of forms at once.
-
Import from Accounting Software: TaxFileApp allows you to import data from popular accounting software like QuickBooks, Xero, FreshBooks, and Zoho Books.
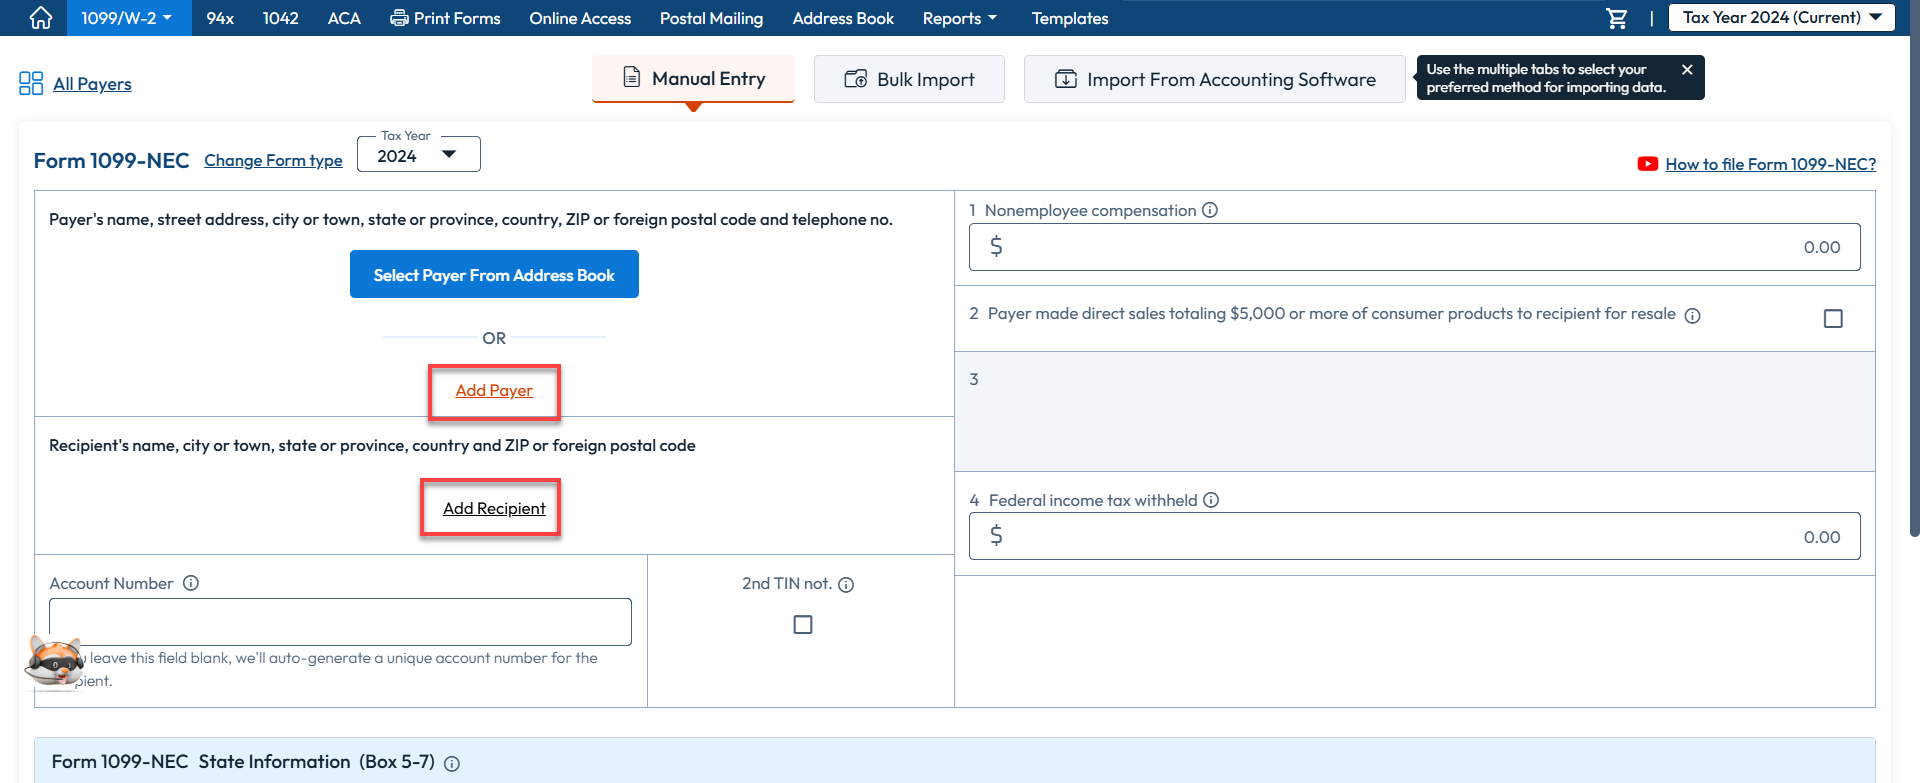
For this guide, we will select 'Manual Entry'.
-
Enter Payer and Recipient Details: You can add a new payer or select one from your address book.
-
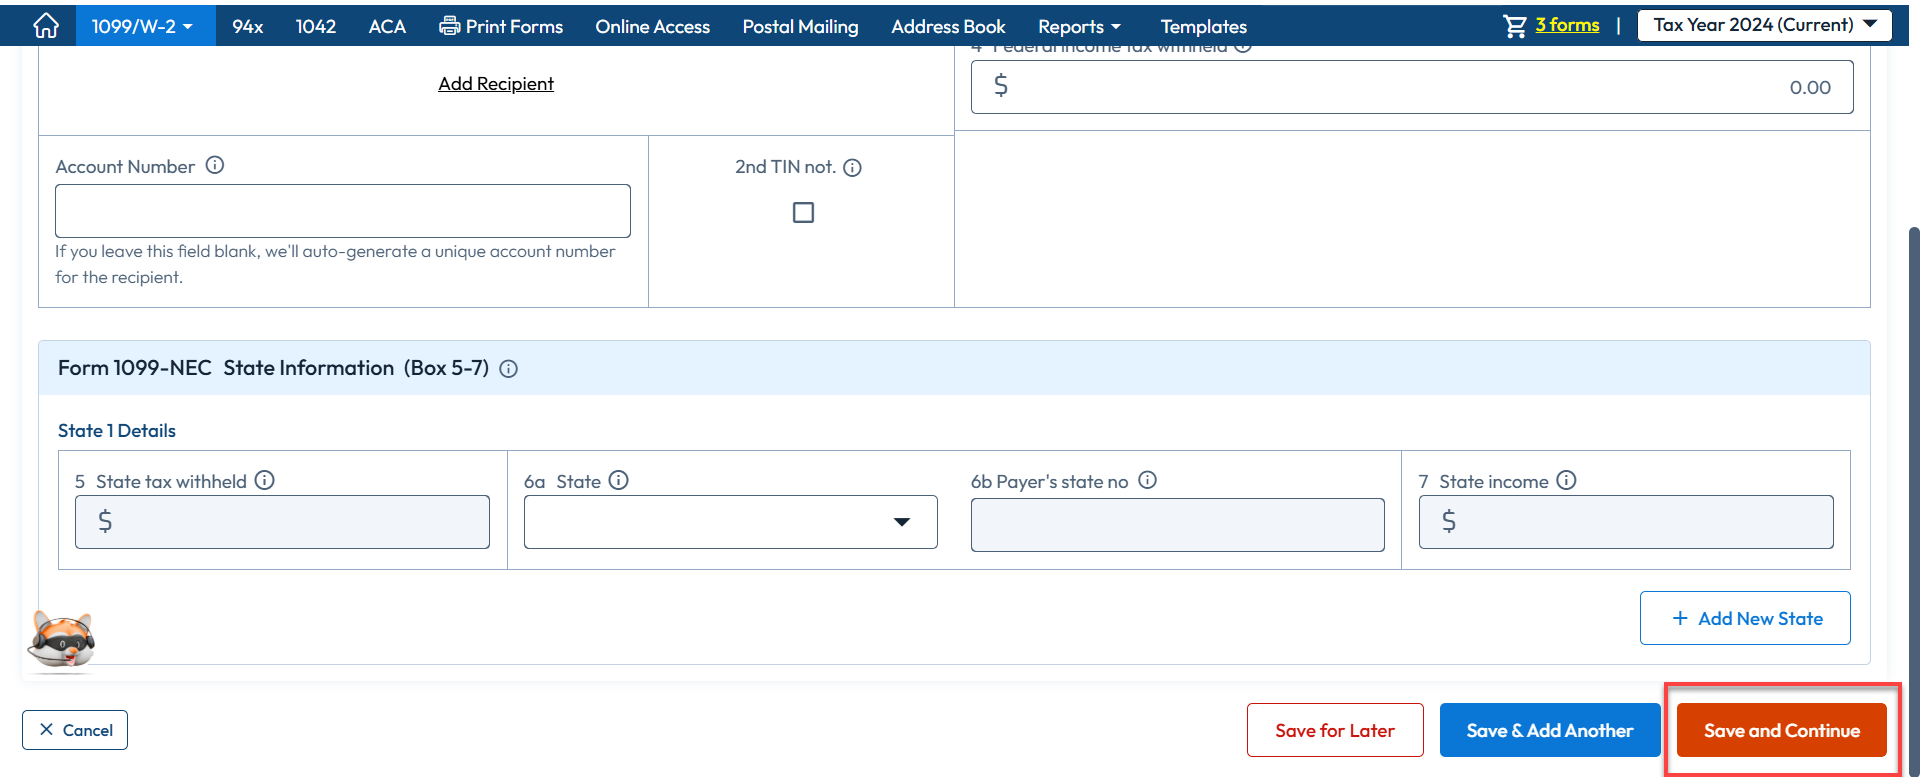
Review: Review the summary of the forms.

-
State Information: Check your state filing requirements, you can select or deselect the states you want to file with.

-
Form Distribution: Choose a form distribution method.
- Postal Mailing: We will print and mail the forms to your recipients.
- Online Access: Recipients can view and download their forms from a secure online portal.
- Advanced Distribution: A combination of postal mail and online access for your recipients.
- I will handle the form distribution: You can print and mail the forms yourself.
-
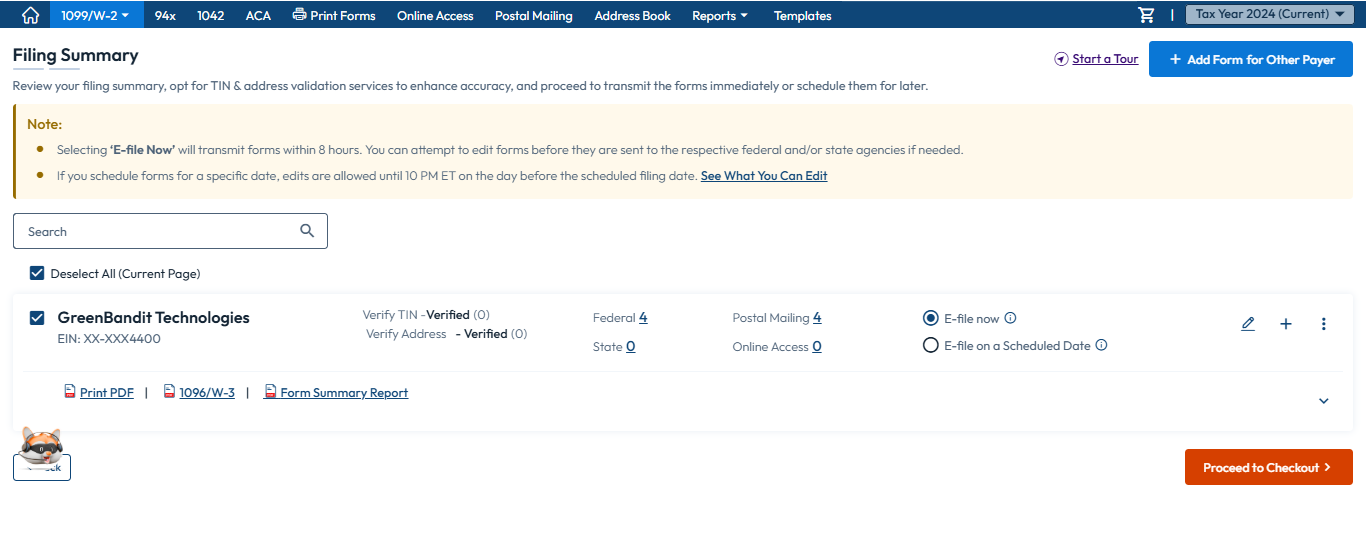
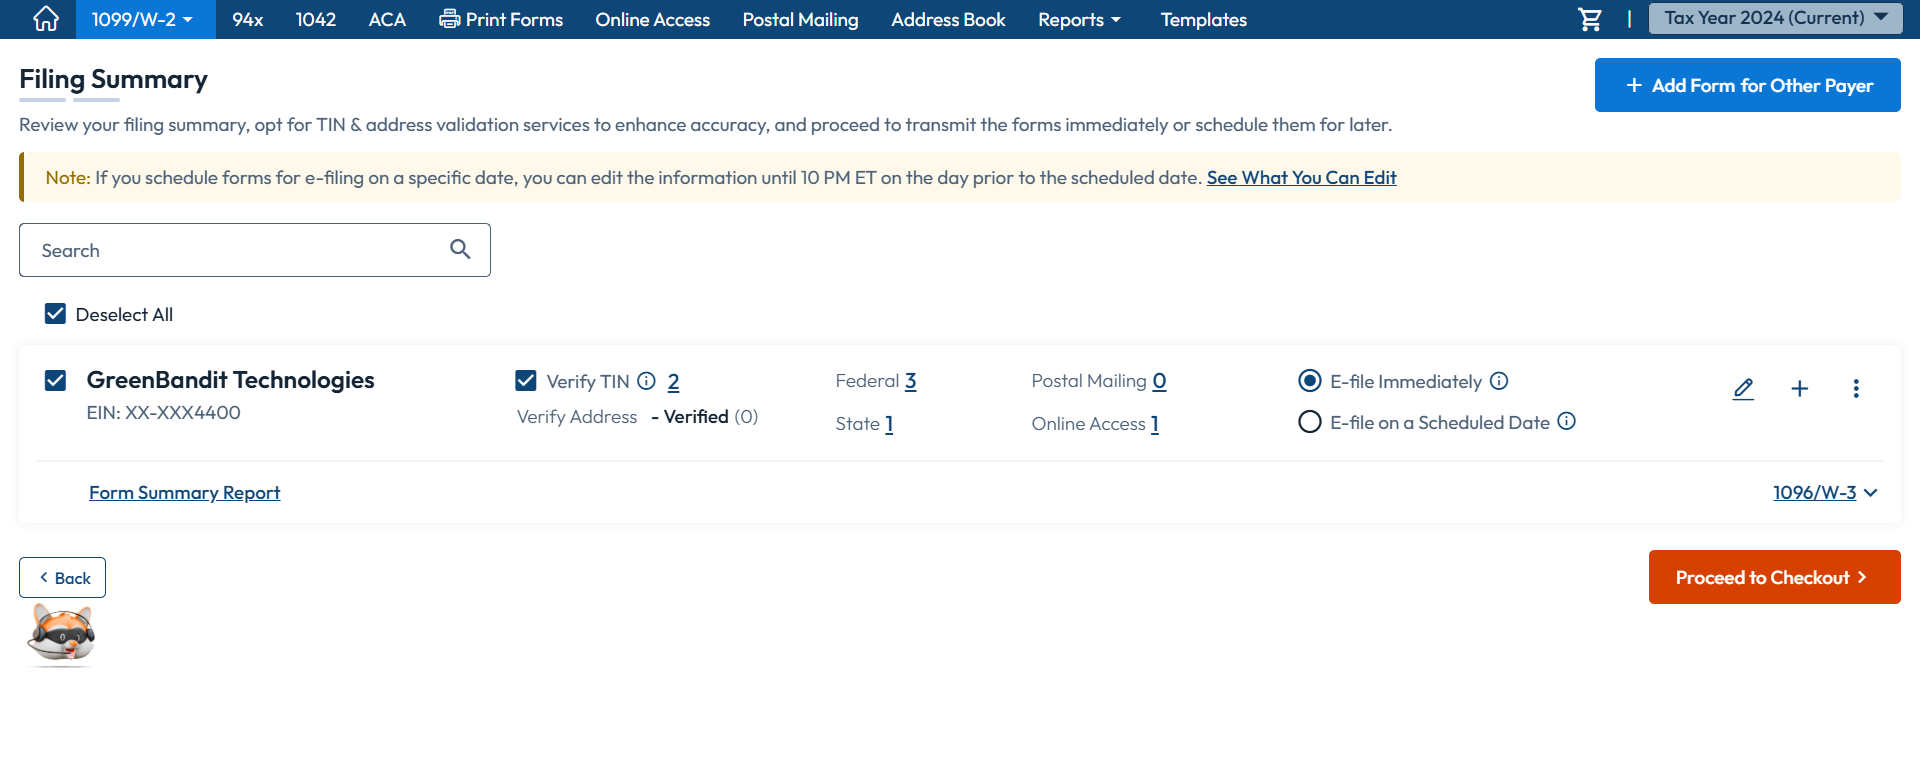
Review: Review the form summary and choose additional services. You can opt for TIN Matching and USPS Address Validation. You can also schedule your filing for a later date.
-
Check out: oceed to payment and transmit the form. You can track the status of your return on the 1099/W-2 dashboard.
Bulk Uploading 1099-NEC Forms
TaxFileApp offers a bulk upload feature for filing multiple 1099-NEC forms at once. You can use your own CSV template or the one provided by TaxFileApp.
How to Bulk Upload Using Your Own Template
- Sign in to your TaxFileApp account and go to the '1099/W2' Dashboard.
- Click 'Start New Form' and choose the form type and tax year.
- Select the 'Bulk Import' option and choose what you want to upload. You can upload recipient data or both payer and recipient data.
- Choose 'Upload Your Own File' and upload your CSV file.
- The system will automatically map the data from your file. You can manually map any remaining fields.
How to Bulk Upload Using TaxFileApp's Template
- Sign in and navigate to the 1099/W2 Dashboard.
- Click 'Start New Form,' select 'Form 1099-NEC,' and the tax year.
- Choose the 'Bulk Import' option.
- Select 'Use Our Standard Template'.
- Download the CSV template, fill it out, and upload it.
How to Copy and Paste Data
- Sign in and go to the 1099/W2 Dashboard.
- Click 'Start New Form,' choose the form type and tax year.
- Select the 'Bulk Import' tab.
- Choose 'Copy and Paste Data'.
- Paste your data into the text box and click 'Continue to Preview'.
How to Void or Correct a Filed 1099-NEC
If you filed a 1099-NEC in error, you can void or correct it by filing a 1099 Correction. Here's how:
- Click Start New Form 1099 Corrections.
- Select the Tax Year and choose 1099-NEC as the form type.
- Enter the payer and recipient information.
- Select the VOID checkbox. The amount fields will automatically be set to zero.
Penalties for Failure to File
The IRS may impose penalties for failing to file Form 1099-NEC on time, with fines ranging from $60 to $660 per form. Penalties can also be imposed for failing to file a correct form with the IRS and for not providing the payee with a correct statement.
How to Bulk Upload 1099-NEC Forms with TaxFileApp
Filing for multiple contractors? TaxFileApp's bulk upload feature is the perfect solution for e-filing a large number of 1099-NEC returns at once. Instead of entering each form manually, you can upload a single file with all your recipient details, saving you valuable time and effort.
Step-by-Step Guide to Bulk Importing Your 1099 Forms
Follow these simple steps to bulk upload your 1099 forms using our secure platform:
- Sign In: Log in to your TaxFileApp account.
-
Navigate to Dashboard: From the main screen, go to the ‘1099/W2’ Dashboard.
-
Start a New Form: Click 'Start New Form' and then choose 'Form 1099-NEC' as the form type.
-
Select Tax Year: Choose the correct tax year for which you are filing.
-
Choose Bulk Import: Select the 'Bulk Import' option. You will be asked to specify the data you want to upload:
- Recipient data with form fields: Best for when you need to upload multiple recipients for a single payer.
- Payer and recipient information with form fields: Use this option to upload multiple payers and all of their associated recipients in one file.
-
Select Your Import Method: TaxFileApp offers several flexible methods to import your data, including using our standard CSV template, uploading your own file, or simply copying and pasting the data.
-
Upload Your Data: Follow the on-screen instructions to upload your file. After uploading, our system will map your data to the correct fields on the 1099-NEC form.

-
Preview & Process: You’ll get a preview of the forms. Carefully check the details for accuracy and then click 'Continue to Process.'
- Review & Fix Errors: On the summary page, you'll see forms that are 'Ready to File' and any that have errors. If errors are found, click 'Fix Errors' to easily edit and correct the information.
-
Federal and State Filing Review: Review the summary of forms ready for federal filing. Based on the data provided, the next page will show your state filing requirements. You can select or de-select states as needed.
-
Select Form Distribution: Proceed to 'Form Distribution' and choose how you want recipient copies delivered. TaxFileApp offers several options:
- Postal Mailing: We will print and mail copies directly to your recipients.
- TaxFileApp Share (Online Access): Grant recipients secure access to view and download their forms from an online portal.
- Advanced Distribution: A custom mix of postal and online delivery for your recipients.
-
Handle Myself: Choose this if you prefer to download the forms and distribute them yourself.

-
Finalize & Transmit: Review the final form summary. Here you can add optional services like TIN Matching or USPS Address Validation, or schedule your filing for a future date. When ready, proceed to payment to transmit your forms to the IRS.
- Track Your Status: After transmission, you can easily track the status of your returns right from your 1099/W-2 dashboard.
Important: CSV File Specifications and Data Formatting
To ensure a smooth and error-free upload, please make sure your CSV file adheres to the following specifications.
File Specifications
- File Format: Your file must be saved as .CSV (Comma-Separated Values). Other formats like .xls or .xlsx are not supported.
- File Size: Files should not exceed 15 MB. If your file is larger, please split it into smaller files.
- Row Limit: For best performance, please limit each file to 20,000 rows (recipients).
- Encoding: Always use UTF-8 encoding to prevent errors with special characters.
Data and Input Specifications
- Mandatory Fields: All fields marked as required must be filled for every record in your file.
- Empty Fields: If a value is not applicable for a specific field, leave the field blank. Do not use placeholders like "N/A" or "NULL."
- Commas in Values: If any of your data (like a business name) contains a comma, you must enclose that value in double quotes (e.g., "Brown, Davis & Partners").
- Headers & Column Order: You can edit the header names in your file. However, do not change the order of the columns, as our system maps data based on the column position in our standard template.
- Duplicate Records: Ensure each record is unique. Duplicate entries can cause submission errors.
- Special Characters: The following special characters are not allowed and will be removed upon upload: < > ; { } [ ] _ \ ! : ? =